A noval Mechanisim Attention Filter
Welcome to the Attention Filter Gate repository! Here, we provide an implementation of our proposed method, the Attention Filter, which is based on the Fast Fourier Transform
Attention Filter Gate
Welcome to the Attention Filter Gate repository! Here, we provide an implementation of our proposed method, the Attention Filter, which is based on the Fast Fourier Transform. In the accompanying PDF document, we explain in detail the steps we have taken to tackle the problem at hand.
Dataset Description
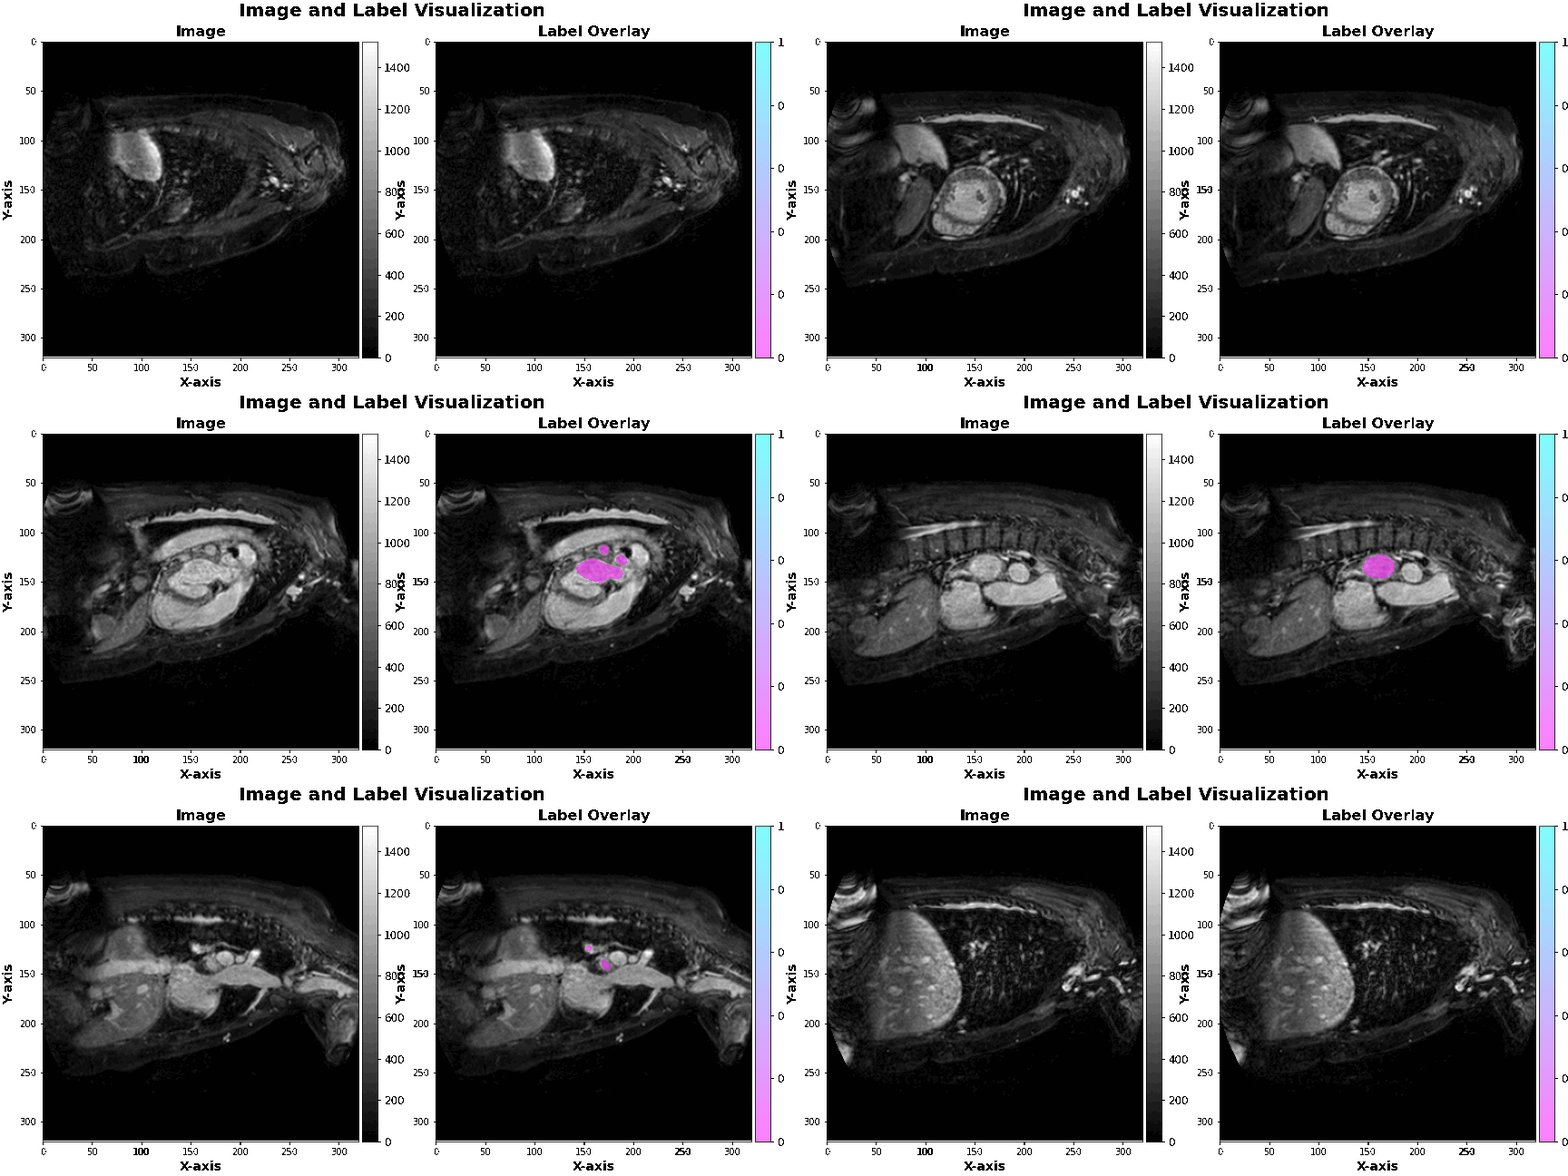
The data used in this project is hosted by a competition on the Kaggle platform, namely the Left Atrial Segmentation Challenge. We have used gmedical images of the left atrium, which are in 3D and come with 30 corresponding masks.
-
Data Source :</br>
The Data we have been used is Host in Kaggle Platform competiotion , to download Run following command : there’re few step needed to be consider before running the Script
-
First:
- Create an account in Kaggle and Get API Token
-
Second:
- Replace your Kaggle API Tokon which stored in kaggle.json in the right path in Script to have authrozation and following this command :
chmod a+x download.sh && ./download.sh
- Replace your Kaggle API Tokon which stored in kaggle.json in the right path in Script to have authrozation and following this command :
-
the Virtualization Sample:
in here navigate to Dataset folder and open jupyter notebook has full virtualization of Medical Images
-

Introduction
In this project, we aim to build a new mechanism, the Attention Filter Gate, which will address the weaknesses of previous approaches used to handle certain problems, such as:
-
Critical Problems we assign
- Losing features during extraction when using deep segmentation models
- Handling data with higher resolutions
- Reducing time complexity of training
- Reducing energy consumption during training
- Learning from spatial domain
Through our exploration of these weaknesses, we aim to provide a better solution to these problems using our proposed Attention Filter Gate mechanism.
Main Abstarct Thesis :
-
Abstract
-
Background:
Medical imaging diagnosis can be challenging due to low-resolution images caused by machine artifacts and patient movement. Researchers have explored algorithms and mathematical insights to enhance image quality and representation. One com- mon task is segmentation, which requires the detection or localization of diseases around the tissue. New approaches and models using artificial intelligence, specif- ically computer vision, have been developed to improve the traditional methods that have not been entirely effective. Since the publication of the U-Net model paper, researchers have focused on building new model architectures to segment medical images more effectively. The Transformers model, a core technology be- hind many AI applications today, has been a game-changer. The Attention Gate was introduced in a paper and used with the U-Net model to increase performance. However, it did not solve certain computational cost issues and led researchers to investigate how to improve the Attention Gate in a different way while maintaining the same structure.
-
Aim :
The aim was to improve the existing Attention Gate used in U-Net for medical image segmentation. The goal was to reduce the computational cost of training the model, improve feature extraction, and handle the problem of matrix multi- plication used in CNN for feature extraction Method The Attention Filter Gate was developed to improve upon the Attention Gate. Instead of learning from the spatial domain, the model was converted to the fre- quency domain using the Fast Fourier Transformation (FFT). A weighted learnable matrix was used to filter features in the frequency domain, and FFT was imple- mented between up-sampling and down-sampling to reduce matrix multiplication. The method tackled computational cost, complexity algorithm, throughput, la- tency, FLOP, and enhanced feature extraction.
-
Results
This study evaluated the performance of two deep learning models, namely Unet and Attention Unet, for image segmentation tasks. The goal was to compare their segmentation accuracy using the mean Dice and mean IoU scores as performance metrics.
The Unet model, based on the U-Net architecture, achieved a mean Dice score of 0.86 and a mean IoU score of 0.82. These results indicate a good level of segmentation performance, with a substantial overlap and similarity between the predicted segmentations and the ground truth masks.
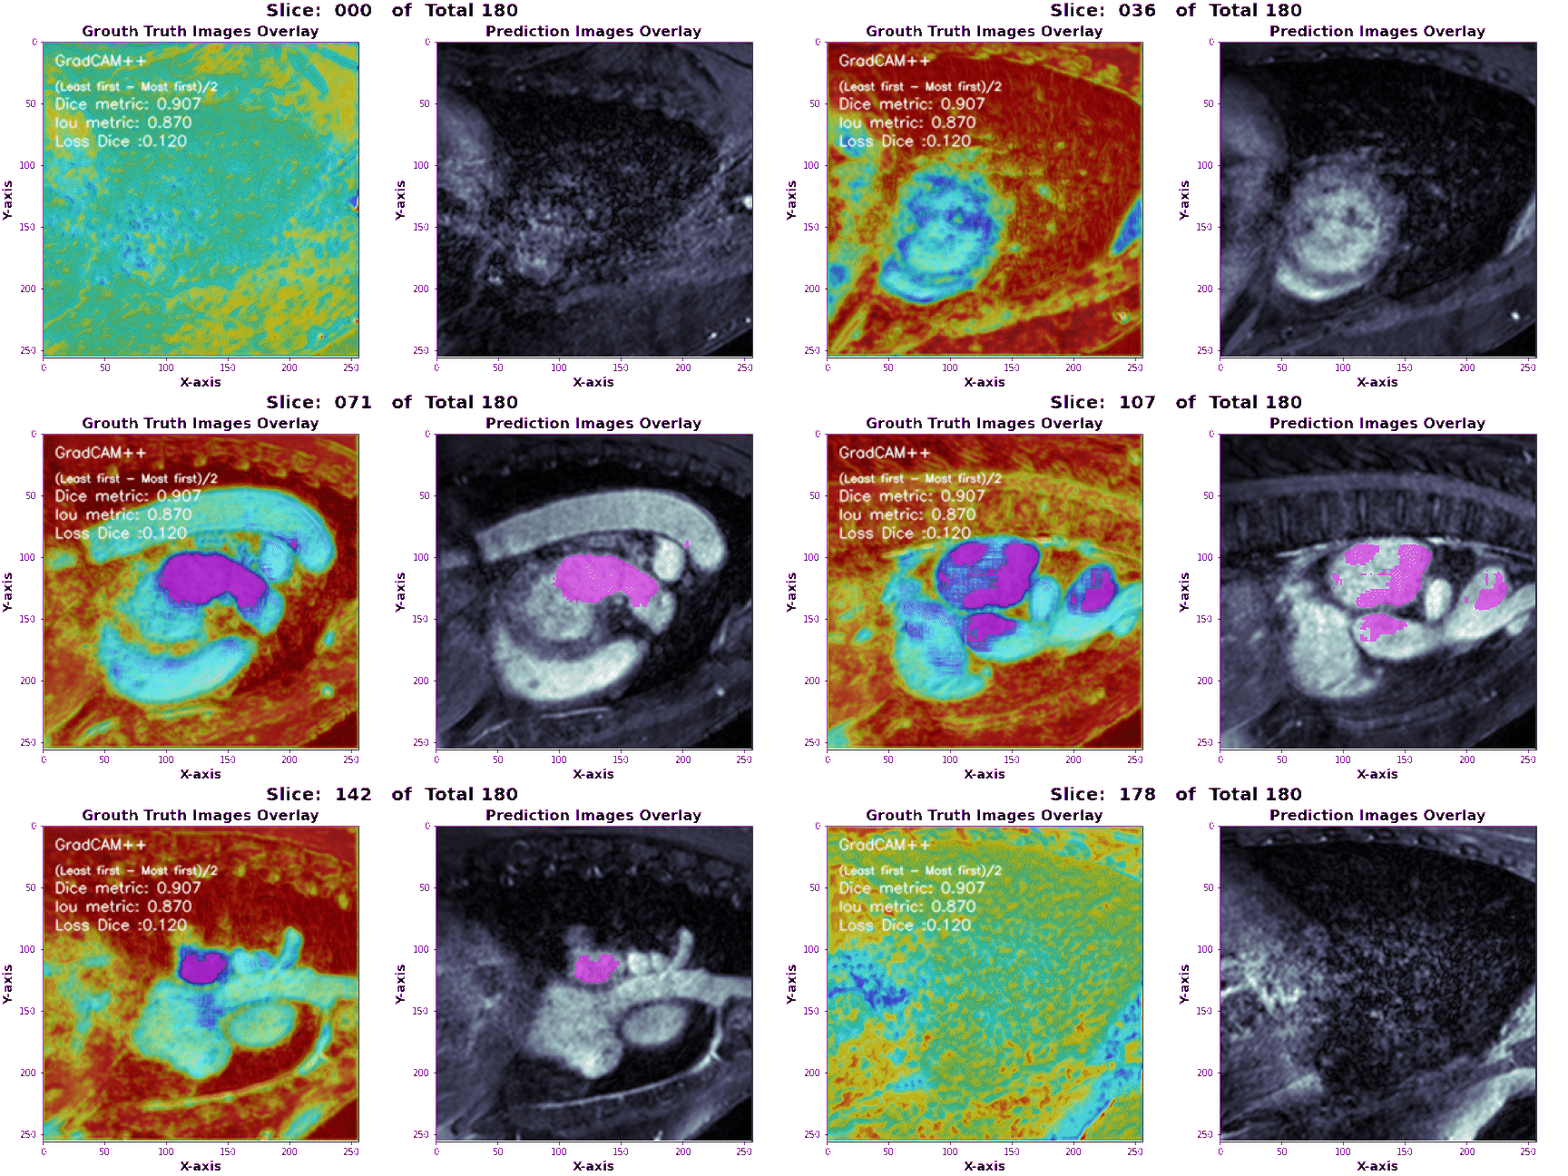
On the other hand, the Attention Unet model, which incorporates attention mechanisms into the U-Net architecture, outperformed the standard Unet model. It achieved a mean Dice score of 0.90 and a mean IoU score of 0.86. The higher scores obtained by the Attention Unet model suggest that it effectively captures intricate details and improves the accuracy of the segmentation predictions.
Overall, the results demonstrate that both the Unet and Attention Unet models are effective for image segmentation tasks. However, the Attention Unet model offers superior performance, surpassing the standard Unet model in terms of both the mean Dice and mean IoU scores. These findings highlight the potential of attention mechanisms in enhancing the accuracy and quality of segmentation results.
Model Mean Dice Mean IoU Unet 0.86 0.82 Attention Unet 0.90 0.86 Attention Filter Unet – – -
Conclusion:
This thesis investigates the Attention Filter Gate to address problems such as computational cost and feature extraction, providing an alternative approach to medical image segmentation that is both efficient and effective. The method en- hances feature extraction to reduce information loss between the encoder and decoder, and it provides a potential solution for throughput, latency, FLOP, and algorithm complexity issues. The Attention Filter Gate improves on the existing Attention Gate with intuitive tricks not addressed by previous methods.
-
Keywords:
Medical Segmentation, Neural networks, Transformers, U-Net model, Attention Gate , Fast Fourier Transformation (FFT)
-
Setup the Enviremenet
so Far after Describing the Problem statment now we will look forward to Config our ENV to run the code following Setps :
-
ENV:
- in this step you will need to create your own env using python following command:
python -m venv venv && source venv/bin/activate - you will need to install dependencies of Project has been used following command
pip install -r requirements.txtProcessing the Data :
- in this step you will need to create your own env using python following command:
after downloading the data by following the guides we provide above , we will need to set the Path of Images and Masks in Directory folder Data that contain following these path :
- root_img : heart-mri-image-dataset-left-atrial-segmentation/imagesTr
- root_lab : heart-mri-image-dataset-left-atrial-segmentation/labelsTr
after getting the right Path run the Script Post_processing.py following command
python Post_processing.py --root_img heart-mri-image-dataset-left-atrial-segmentation/imagesTr \
--root_lab  heart-mri-image-dataset-left-atrial-segmentation/labelsTr
after the script done you will have a new folder Directory contain the processed image Called Processed
Usage
The main script in this project is train.py. It provides command-line arguments for configuring the training process. To run the script check file config.py to tune the model based base lines , use the following command to Run Training model using Multi-GPU or single :
python train.py --Config path/to/config.yaml --Epochs 100 --batch_size 16 --output path/to/output
Command-line Arguments
-
The script accepts the following command-line arguments:
- –Config: Path to the configuration file in YAML format.
- –Epochs: Number of training epochs.
- –batch_size: Batch size for training and validation.
- –output: Path to the output directory.
-
Configuration
The configuration file specified by the –Config argument should be in YAML format. It should contain the following parameters:
num_workers: Number of workers for data loading. train_path: Path to the training data. val_path: Path to the validation data.
Make sure to update the configuration file with the appropriate values for your dataset. Training
Training
1.During the training process, the script performs the following steps:
- Initializes the configuration settings.
- Writes the configuration to a YAML file.
- Parses the command-line arguments.
- Reads the configuration from the YAML file.
- Loads the training and validation datasets.
- Initializes the data loaders.
- Defines the loss function.
- Instantiates the segmentation model.
- Sets up callbacks for model checkpointing, CPU usage - - monitoring, and throughput logging.
- Starts the training using the Trainer.fit method.
Running Prediction
To run the prediction script and generate segmentations for your test samples, follow the steps below:
-
Ensure that you have the necessary dependencies installed. If you haven’t installed them yet, refer to the Getting Started section.
-
Open the terminal and navigate to the project directory.
-
Run the following command to execute the
predict.pyscript:python predict.py --Config path/to/config.yaml --sample path/to/test_sample.nii --output path/to/output

-
Note
-
The –Config argument should point to the YAML configuration file that contains the necessary settings for the prediction.
-
The –sample argument should provide the path to a single test sample in NIfTI format (e.g., .nii or .nii.gz).
-
The –output argument specifies the directory where the generated segmentations will be saved.
Make sure that the configuration file, test sample, and output directory paths are correct and accessible. > > The script will use the latest checkpoint file found in the
./Wieghts/logsdirectory for loading the pre-trained model. > > The generated segmentations will be saved in the output directory as separate image files. -
